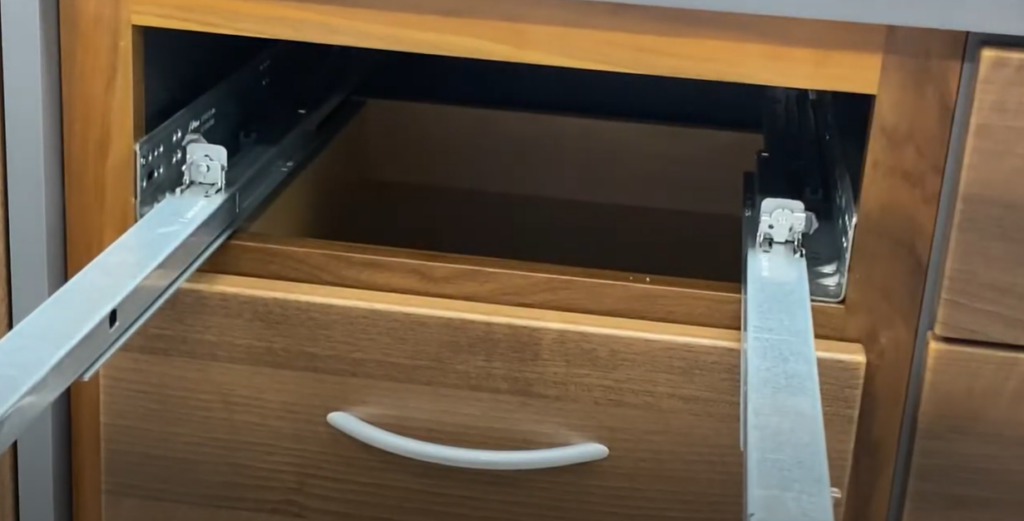
That drawer in your kitchen keeps sticking. You push, it resists. Pull harder, and it screeches like a rusty gate. We’ve all been there – fighting with a drawer that should glide smoothly but doesn’t. Let’s learn how to fix drawer slides in 3 easy steps.
The good news? You don’t need to be a master carpenter to fix drawer slides. In fact, most drawer problems come down to three simple issues: misalignment, dirt buildup, or lack of lubrication.
Ready to turn those problematic drawers into smooth operators? Let’s walk through the three key steps that will get your drawers working like new again.

How to Fix Drawer Slides [Step 1]: Identify the Problem with Your Drawer Slides
- Quickly spotting problems can save time and effort later.
- Knowing your slide type tells you how to fix it.
- Some slides can be fixed, saving you money.
1.1 Inspect the Drawer Slides
To solve any drawer slide issue, start by checking for common problems like wear and rust. Physical damage is another area to look into. Notice any loose slides or missing screws. Proper inspection is crucial since around 70% of drawer problems come from neglect or lack of basic maintenance.
Missing screws can lead to misalignment, causing sticky or noisy operation. Rust or physical damage often results from moisture exposure or heavy use over time. However, much of the damage can be reduced by routine checks and keeping the slides dry and clean. The tool kit should always include basic items like a screw driver and cloth for this regular upkeep.

[Action Items]:
- Tighten any loose screws immediately.
- Keep the area around slides dry and free from moisture.
- Replace any damaged segments quickly to prevent further harm.
1.2 Determine the Slide Type
Knowing the slide type your drawer uses is important for the right repair method. The main types are side-mount, center-mount, and under-mount. Each type has benefits and drawbacks and knowing your type helps decide on fixes quickly.
Side-mount slides are most common, often offering full-extension and affordable costs. Center-mount slides are partially hidden but offer limited drawer access. Under-mount slides give a clean look but can be harder to install, often needing specific installation kits. Spot see-through side panels if you are unsure about your slide type.
With each slide type demanding different levels of repair skill, acknowledging these characteristics allows a fitting approach. Most design books illustrate different slide types and their correct installations.
[Action Items]:
- Match the repair strategy to the slide type.
- Check if additional resources are needed for under-mount slide repairs.
- Consider replacing slides if current ones are beyond repair.
How to Fix Drawer Slides [Step 2]: Fixing Misaligned Drawer Slides
- Take the drawer out to fix slides.
- Adjust screws for better alignment.
- Test to ensure proper movement.
2.1 Realign the Drawer Slides
Remove the Drawer Completely
Pull the drawer all the way out. This step is crucial for access. Grab the sides of the drawer and give it a steady pull. If it’s stubborn, you might have to lift it slightly. Some drawers might have safety clips. If yours does, push these clips to release. This ensures complete access to the slides for adjustment. Removing a drawer helps you see any underlying issues like loose screws or rust spots better. Keep the drawer aside, ensuring it doesn’t tip over.

Adjust the Slides for Proper Alignment
Look at the screws holding the slide to the cabinet and the drawer. Loosen them just a bit. This allows for some movement. Use a small screwdriver or a drill set on low. Check the distance from the face of the cabinet to the slides. About 3/32″ to 1/8″ back is ideal. Adjust the slides to maintain this distance evenly on both sides. Ensure the slides are level. If not, adjust them. Use a level tool for accuracy. If the cabinet is not perfectly square, aim for the slides to be perpendicular to the cabinet’s face. This setup will support flush drawer closure.
2.2 Test the Slide Alignment
Check the Drawer Movement
Reinsert the drawer into its slides once everything looks aligned. Gently push the drawer back in. Feel for any resistance or unusual friction. If the drawer glides smoothly, you’re on the right track. If not, you’ll need to make adjustments. Sometimes, a drawer may rub against the cabinet. In such cases, revisit the adjustments. Misalignment can become a headache if not dealt with correctly. Moving the slide up slightly might fix issues if the drawer isn’t level. Repeat the process until the drawer smoothly closes and sits flush with the cabinet.
Misalignment can lead to drawers rubbing against cabinet faces. Identify, loosen, adjust, and test the slides to resolve this.

Repeat Adjustments if Needed
If the drawer still doesn’t behave, repeat the steps. Loosen the screws again. Realign the slides by following the established distance guidelines. Sometimes small shims can help. Place them between the slide and the cabinet or drawer. This can correct minor alignment issues. Shims can be wood or plastic and help balance out any unevenness. Once adjusted, check again. Finally, tighten the screws firmly once you’re happy with the alignment. A well-aligned slide keeps the drawer functional and maintains the cabinet’s aesthetics.
How to Fix Drawer Slides [Step 3]: Lubricating Drawer Slides for Smoother Operation
- Clean slides first for effective lubrication.
- Use silicone spray or beeswax to avoid dirt buildup.
- Avoid WD-40, it attracts dust and grime.
3.1 Clean the Drawer Slides
Before applying any lubricant, it’s crucial to clean the slides. Any dirt or dust can cause poor performance afterward.
- Remove the Drawer: If possible, take the drawer out completely for easy access. This will help you reach every part of the slides.
- Wipe with a Damp Cloth: Use a damp cloth to gently wipe down the surfaces of the slides. Make sure to get into the grooves and edges where debris accumulates. If dirt is stubborn, use mild dish soap.
- Dry Thoroughly: After cleaning, make sure the slides are completely dry. Use a dry cloth to wipe away any moisture.
Regular cleaning is recommended at least twice a year or more often if the drawer is used frequently, according to various sources.

Potential Pitfalls When Cleaning
- Don’t use harsh chemicals; they can damage the metal.
- Avoid soaking the slides; moisture can lead to rust.
Once cleaned and dry, the slides are ready for lubrication.
3.2 Apply the Lubricant
Choosing the right lubricant ensures optimal performance and longevity.
- Select the Correct Lubricant: Silicone spray, white lithium grease, Teflon dry lube, and beeswax are recommended. Silicone spray and beeswax are especially gentle and less likely to attract dirt. Avoid WD-40 and graphite; they can make a mess and gather grime.
- Apply Evenly: Shake the silicone spray can well. Hold it 8-10 inches from the slide. Spray an even coat on all moving parts. Be sure not to saturate. Move the slide back and forth to distribute.
- Test the Movement: After application, reinsert the drawer and test its movement. It should slide smoothly without resistance. If necessary, apply a little more lubricant.
Maintenance and lubrication should be conducted at least twice a year, or more often for heavily used drawers.

Types and Best Practices
- Use beeswax for wooden slides, as it won’t cause warping.
- Silicone spray is great for metal slides as it dries fast and clean.
By following these steps, you should find your drawers sliding much more smoothly. With regular attention, drawer slides will last longer and function better.
Advanced Tips for Drawer Slide Repair Tips
- Tools like pliers help with tight spaces.
- Replace slides if they are too damaged.
- Avoid oil lubricants due to dust attraction.
Additional Advice or Alternative Methods
Advanced drawer slide repair can often require more than just basic tools. If you’ve struggled with screws that seem impossible to remove, pliers can be a game changer. Their design allows you to grip small items, making them especially useful for those hard-to-reach or tight spaces within the drawer assembly. For extensive damage, sometimes the best course of action is to replace the slides entirely. While repairing might initially seem more economical, repeatedly patching up serious damage could lead to more time and expense in the long haul.
When considering replacements, assessing the costs versus benefits is crucial. Slide replacements can be an investment. Yet, they often provide a long-term solution improving functionality and smoothness, which ultimately enhances user satisfaction.
Common Pitfalls and How to Avoid Them
One common mistake in drawer slide repair is using the wrong type of lubricant. Oil-based lubricants are a frequent choice because they are readily available. However, they attract dust and debris quickly, which can cause clogging. This means you should opt for silicone-based sprays or even beeswax, which offer smoother motion without the downside of collecting dirt. The wrong lubricant can undo all repair efforts, leading you back to square one.
Tightening screws uniformly when reinstalling slides is another critical task but often overlooked. Misalignment occurs if screws are not tightened evenly. This can cause drawers to wiggle or jam, negating all your repair efforts. A systematic approach ensures screws are tightened uniformly. Tighten them in stages, alternating sides, to maintain alignment. It’s basic physics—equal tension distributes weight and forces evenly.

Troubleshooting Common Issues
- Stop drawers from sticking by clearing their path. Realign when needed.
- Replace damaged slides by measuring and fitting correctly.
Stuck or Stiff Drawer Solutions
Obstructions often cause drawers to stick or feel stiff. First, remove the drawer completely. Look for any items blocking the slide path. Clean up any debris, like crumbs or small objects, that could cause resistance. If an obstruction isn’t the problem, move on to realignment.
Re-evaluating the alignment is key. Over time, drawer slides can shift due to use. Begin by loosening screws along the slide rail. Use a level tool. Ensure the slides are straight. Then, tighten the screws. This ensures they are securely in the correct position. Check alignment from both sides of the drawer for consistency.
Replacing Broken Drawer Slides
If the slide is broken, replacement is necessary. Start by measuring the length of the existing slide. Use a ruler or measuring tape. It must be precise to ensure you purchase a correctly sized replacement. The slide should match both the length and type, such as side-mount, center-mount, or under-mount.
Choose a replacement slide that fits these measurements and type. When buying a new slide, ensure it is from a reputable brand. This ensures quality and compatibility. Once you have the right slide, remove the broken one by unscrewing the fasteners, then align and screw the new slide into place. Double-check all screws for stability to prevent future issues.
Ensuring Proper Function After Replacement
After installing the new slides, test the drawer by sliding it in and out. Ensure it moves smoothly without stiffness. If there is any sticking, double-check the alignment. Make sure all screws are tight. This helps in maintaining a smooth operation.
Following these troubleshooting steps helps to address common drawer slide issues efficiently. Now, you’ll find solutions for stuck or stiff drawers and handle broken slides without hassle, boosting your drawer’s performance.
Moving Forward with Confidence on How to Fix Drawer Slides
Fixing drawer slides might seem like a small task, but it’s a perfect example of how minor repairs keep your home working smoothly. With these three steps, you’ve learned to spot problems, fix alignments, and maintain your drawer slides properly.
The best part? You don’t need to call a repair service every time a drawer sticks or squeaks. You now have the skills to handle these issues yourself. This saves money and gives you control over your home maintenance.
Remember the key points: check for issues early, keep your slides clean, and use the right lubricant. If you run into trouble, go back to the basics – remove the drawer, inspect the slides, and work through each step carefully.
Keep this guide handy for your next drawer repair project. Regular maintenance prevents bigger problems later. When you hear that smooth glide of a perfectly working drawer, you’ll know your work paid off.
Want to practice? Pick one drawer in your home that needs attention. Use these steps to fix it today. Small successes build confidence for bigger home repair projects tomorrow.


