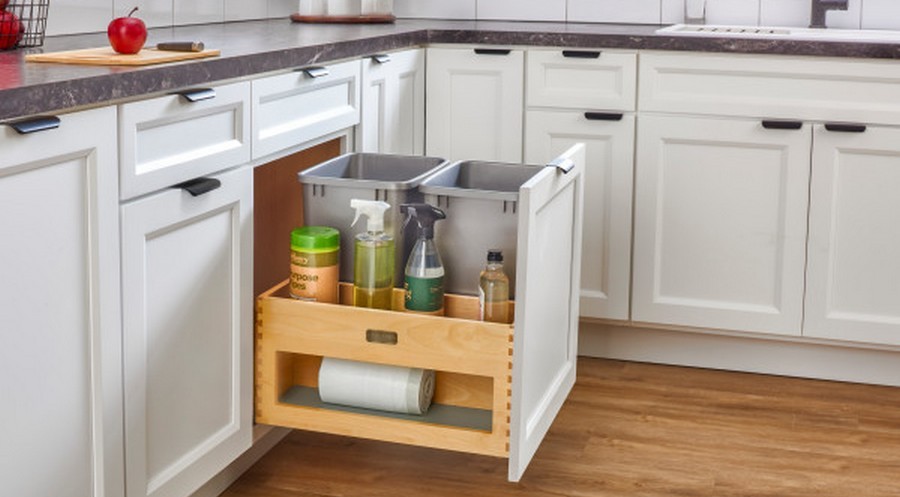
A pull-out trash can is one of the easiest kitchen upgrades that delivers huge everyday convenience. It hides the bin, keeps pets out, and turns unused cabinet space into functional storage. But the key to a smooth, long-lasting result is accuracy, not guesswork.
I learned that lesson the hard way when I skipped three measurements and watched the door scrape, the slides bind, and the frame sit crooked. A 30-minute project turned into an hour of rework. The fix? Measure twice, mount square, and test before tightening screws.
This guide walks you step by step through a clean, professional-grade installation. The same order professionals use: measure first, mount square, attach last.

Quick Skim Summary: How to Install a Pull-Out Trash Can
| Step | Action | Key Tools & Materials | Pro Tip / Watch-Out |
|---|---|---|---|
| 1. Choose the Right Kit | Measure cabinet width, depth, and height. Match kit size to your cabinet and household needs. | Tape measure, spec sheet, masking tape | Tape the bin footprint on cabinet floor to confirm door clearance before buying. |
| 2. Gather Tools & Prep Area | Collect all tools before starting. Clear out cabinet space. | Drill/driver, 1/8″ bit, level, square, screws, shims | Check all kit parts for damage or missing hardware before install. |
| 3. Mark Reference Lines | Strike a height line for slide placement on both cabinet sides. | Level, pencil, measuring tape | Keep both slides level within ±1 mm to prevent binding. |
| 4. Mount Slides Square | Mount left slide first, then mirror on right. Match front and rear distances. | Drill, spacer block, screwdriver | Run slides 10× to ensure smooth glide before securing. |
| 5. Install Base Frame | Position frame level, set one screw, test glide, then lock remaining screws. | Shims, square, screws, level | Measure diagonals within 2 mm for a true square base. |
| 6. Attach Door (Optional) | Mount face panel to frame using adjustable brackets. Align reveals evenly. | Screwdriver, brackets, square | Leave all screws loose until reveal looks uniform, then tighten. |
| 7. Final Test & Adjust | Run full-extension tests to confirm smooth glide and even return. | Bin tray installed | If glide drags, loosen rear screws slightly and shim low side. |
| 8. Maintenance & Odor Control | Keep slides clean and lubricated every 6 months. Wash bin weekly. | Silicone spray, mild soap, baking soda | Avoid petroleum lubricants; they attract dust. Use charcoal packets for odor control. |
Why Install a Pull-Out Trash Can?
A pull-out trash system keeps your kitchen cleaner, safer, and more organized.
- Cleaner look: hides trash bins behind cabinet doors
- Odor control: keeps smells sealed and out of sight
- Pet protection: prevents animals from accessing waste
- Space optimization: makes use of dead space near the sink
- Ease of use: glides smoothly on slides for everyday convenience
When installed correctly, the system glides straight, latches softly, and stays square — even after years of use.

Step 1: Choose the Right Pull-Out Trash Can Kit
Pick the kit that fits your cabinet, not the other way around. The correct width, depth, and frame style ensure smooth installation and operation.
| Cabinet Opening Width | Recommended System | Bin Capacity |
|---|---|---|
| 12–14 inches | Single 35-quart bin | Compact kitchens |
| 15–18 inches | Single 50-quart or Dual 35-quart bins | Medium spaces |
| 21 inches or more | Dual 50-quart bins | Large kitchens / families |
Measure carefully:
- Width: Inside frame-to-frame clearance at the cabinet opening
- Depth: From the inside of the closed door to the back wall (match to slide length)
- Height: Floor to underside of countertop (leave 1 inch above bin rim for bag fit)
Face-frame vs. frameless:
Face-frame cabinets often need rear brackets or spacers; frameless styles mount directly.
Pro tip: Tape the bin footprint on the cabinet floor before buying. Close the door to confirm clearance around plumbing, hinges, and disposal lines.

Step 2: Gather Tools and Materials
Having everything within reach keeps your install efficient.
You’ll need:
- Drill/driver and 1/8-inch bit
- #8 x ¾-inch wood screws (8)
- Carpenter’s square
- Level and measuring tape
- Pencil or marking tool
- Shims or spacers
- Safety glasses
- The pull-out trash can kit (with brackets if face-frame)
Before you start, inspect all parts. Verify that slides extend evenly and that hardware isn’t missing. Most modern kits include self-closing or soft-close slides — ensure both rails retract smoothly before mounting.
Step 3: Mark Reference Lines and Mount Slides
The slides are the foundation of your pull-out system. Level slides = smooth glide.
- Strike a height line on both cabinet sides where slides will sit. Use a level — this ensures your carriage rides on a true plane.
- Clamp a spacer block at the face frame to maintain equal setback on both sides.
- Mount the left slide first. Then mirror it on the right side, matching the front and rear distances within ±1 mm.
- Test the alignment. The slides should move parallel with no tilt or wobble.
- Secure the rear screws. Don’t overdrive; snug by hand to avoid shifting parts.
Pro tip: Run the slides in and out 10 times. If they feel uneven or scrape, loosen the rear screws, shim lightly, and retest.
Step 4: Install the Base Frame
Once slides are square, the frame mounts directly to them.
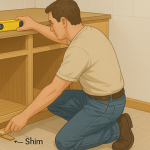
- Set the base frame on shims so it’s perfectly level front-to-back and side-to-side.
- Fasten through the slotted holes.
- Measure diagonals — both should be within 2 mm for true square.
- Dry-fit the carriage and glide it in/out several times to confirm smooth motion.
Avoid skipping this test. A single degree of twist in the base can cause long-term binding or uneven wear.

Step 5: Attach the Cabinet Door (Optional)
If your pull-out system includes a door-mount kit, this step integrates the cabinet door onto the pull-out frame.
- Position the face panel where you want the reveal to sit.
- Attach adjustable brackets loosely to the back of the door.
- Align reveals — adjust using the slot system until the door sits flush and even.
- Lock screws once reveals look consistent on all sides.
If you prefer a handle-operated pull, skip this step and leave the door independent.
Step 6: Final Checks and Test Pull
Before adding the bin:
- Slide test: Open and close fully 10 times. The glide should feel even, with no drag or noise.
- Return test: Pull out 3 inches, release. It should return smoothly without racking.
- Clearance check: Ensure no interference with hinges or plumbing.
- Weight test: Add light pressure on the bin track — it should stay level and return smoothly.
If you hear rubbing or feel resistance, adjust shims until alignment is perfect. Tighten all fasteners when satisfied.

Step 7: Maintenance and Odor Control
Keep the system clean and odor-free with light maintenance.
- Monthly: Wipe crumbs and dust from slides.
- Every 6 months: Apply silicone-based lubricant (avoid petroleum).
- Weekly: Wash bins with warm, soapy water.
- Odor control: Add a charcoal or baking soda packet under the liner.
- Child & pet safety: Use a simple cabinet catch to lock access.
Most quality systems (like Rev-A-Shelf or Knape & Vogt) last over 10,000 cycles when maintained properly.
ADA Accessibility Tip for Installing a Pull Out Trash Can
For ADA compliance in public or accessible kitchens, position the pull handle between 15–48 inches above the floor per ADA 2010 Standard 308.
Reference: ADA Standards for Accessible Design (PDF)
Final Thoughts: Install Pull Out Trash Can
That first crooked install taught me everything: the difference between a 67-minute frustration and a 30-minute success is measurement and order.
When you measure twice, mount square, and test before attaching, your pull-out trash can glides effortlessly, fits flush, and stays quiet for years.
Most kits now ship with excellent hardware, but they can’t measure your cabinet for you. That part is up to you, and it’s the one that makes all the difference.


